Complete Guide
How to Count Macros: Step-by-Step Guide
The step-by-step system for tracking your protein, carbs, and fats — from absolute beginner to confident tracker.
Medically reviewed by Dr. Michael Torres, PhD
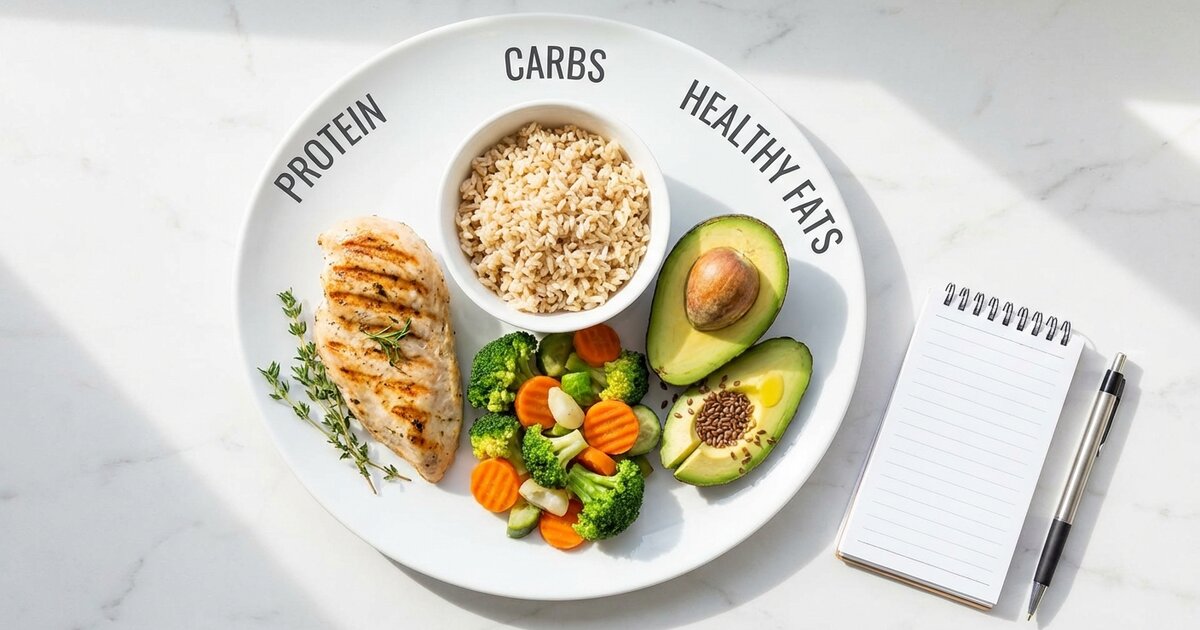
What Is Macro Counting?
Counting macros (or “tracking macros”) means monitoring the grams of protein, carbohydrates, and fat you eat each day. Instead of just counting calories, you’re paying attention to where those calories come from — which matters for body composition, energy levels, and overall health.
Here’s the key insight: 1,500 calories of mostly protein and vegetables will affect your body completely differently than 1,500 calories of mostly bread and sugar — even though the calorie count is identical. One builds muscle and burns fat. The other leaves you hungry and depleted.
Macro Counting vs. Calorie Counting
Approach What You Track Best For Calorie counting Total energy intake only Basic weight management Macro counting Energy + composition (P/C/F) Body composition, performance Macro counting is more precise for anyone with specific body composition goals.
Before diving into the technical details, beginners should start with the fundamentals (counting macros for beginners).
Why Count Macros?
Before diving into the how, let’s establish the why. Tracking macros offers several advantages over simpler approaches:
1. Precision for Body Composition
Calories determine whether you gain or lose weight. Macros determine whether that weight is muscle or fat. If you want to lose fat while keeping muscle, you need to know you’re getting enough protein — not just eating fewer calories.
2. Better Understanding of Food
After a few weeks of tracking, you’ll have an intuitive understanding of:
- Which foods are protein-dense
- How calorie-dense fats really are
- Realistic portion sizes
- Hidden calories in cooking oils, sauces, and condiments
This education lasts forever, even if you stop tracking.
3. Flexibility and Freedom
Unlike rigid meal plans that tell you what to eat, macros tell you how much of each nutrient to get. You choose the foods. This flexibility makes macros sustainable long-term.
4. Troubleshooting Ability
When progress stalls, macros give you data to diagnose the issue:
- Not losing fat? Check if you’re actually in a deficit
- Losing muscle? Protein might be too low
- Low energy? Carbs might be insufficient
Without tracking, you’re just guessing.
Step 1: Calculate Your Macro Targets
Before you can track, you need to know your targets. Your macros depend on:
- Total Daily Energy Expenditure (TDEE) — How many calories you burn
- Your goal — Fat loss, muscle gain, or maintenance
- Activity level — Sedentary, moderate, or very active
- Body composition — More muscle = higher calorie needs
The calculation process is straightforward, but following a structured approach ensures accuracy (how to calculate macros step-by-step).
Understanding TDEE
Your TDEE is the total energy you expend daily, including:
- Basal Metabolic Rate (BMR) — Calories burned at rest (~60-70% of total)
- Thermic Effect of Food (TEF) — Calories burned digesting food (~10%)
- Non-Exercise Activity (NEAT) — Daily movement, fidgeting, walking (~15-30%)
- Exercise Activity (EAT) — Intentional workouts (~5-10%)
Most TDEE calculators estimate this based on your stats and activity multiplier.
The Quick Calculation Method
For a rough estimate without a calculator:
| Activity Level | Multiply Bodyweight By |
|---|---|
| Sedentary (desk job, no exercise) | 12-13 |
| Lightly active (1-3 workouts/week) | 13-14 |
| Moderately active (3-5 workouts/week) | 14-16 |
| Very active (6+ workouts/week) | 16-18 |
| Extremely active (athlete, physical job) | 18-20+ |
Example: 170-lb moderately active person → 170 × 15 = 2,550 calories/day (maintenance)
Setting Macro Targets
Once you have your calorie target, distribute it across macros:
Step 1: Set Protein First Protein is the priority. Calculate based on bodyweight:
| Goal | Protein Amount |
|---|---|
| Fat loss | 0.9-1.1g per pound bodyweight |
| Maintenance | 0.7-0.9g per pound bodyweight |
| Muscle gain | 0.8-1.0g per pound bodyweight |
Step 2: Set Fat Minimum Fat supports hormones and health. Don’t go below:
- Minimum: 0.3g per pound bodyweight
- Moderate: 0.35-0.45g per pound
- Higher-fat preferences: 0.5g+ per pound
Step 3: Fill Remaining Calories with Carbs Subtract protein and fat calories from your total, then divide by 4:
Remaining calories = Total - (Protein × 4) - (Fat × 9)
Carbs = Remaining calories ÷ 4
Full Calculation Example
Sarah: 150 lbs, moderately active, fat loss goal
- TDEE estimate: 150 × 14 = 2,100 calories
- Fat loss calories: 2,100 - 400 = 1,700 calories (moderate deficit)
- Protein: 150 × 1.0 = 150g (600 calories)
- Fat: 150 × 0.35 = 53g (477 calories)
- Carbs: (1,700 - 600 - 477) ÷ 4 = 156g
Sarah’s targets: 1,700 cal | 150g protein | 156g carbs | 53g fat
Skip the Math — Use Our Calculator
Get your exact macros calculated in 60 seconds. No email required.
Calculate My Macros →Step 2: Get the Right Tools
You need two essential tools to count macros effectively:
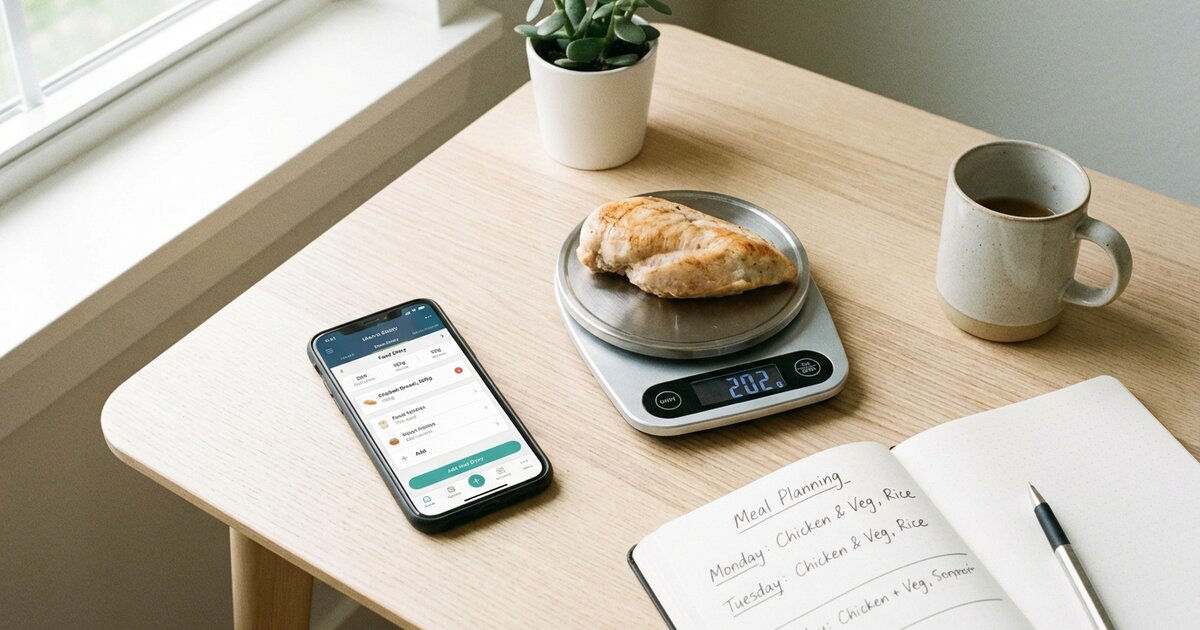
Tool #1: A Digital Food Scale
A food scale is non-negotiable for accurate tracking. Why? Because humans are terrible at estimating portions.
Research shows:
- People underestimate calorie intake by 40-60% on average
- Even nutrition professionals underestimate by 25-30%
- A “tablespoon” of peanut butter might be 2-3 tablespoons
- A “medium” banana might be large (30% more carbs)
What to look for in a scale:
- Tare function — Resets to zero with a container on it
- Gram measurements — More precise than ounces
- Flat surface — Fits bowls and plates
- Max capacity — At least 5 kg / 11 lbs
Budget recommendation: Any $10-15 digital kitchen scale works perfectly. Expensive features are unnecessary.
Pro tip: Keep your scale on the counter. If it’s buried in a drawer, you won’t use it.
Tool #2: A Tracking App
You’ll log everything you eat in an app that calculates macros automatically (how to track your macros). Here are the top options:
MyFitnessPal
- ✅ Largest food database (14+ million foods)
- ✅ Barcode scanner
- ✅ Social features and recipe import
- ❌ User-submitted entries can be inaccurate
- 💰 Free with premium option ($79.99/year)
- Best for: Beginners, social accountability
Cronometer
- ✅ Most accurate database (verified entries)
- ✅ Excellent micronutrient tracking
- ✅ Clean interface
- ❌ Smaller database than MFP
- 💰 Free with premium option ($49.99/year)
- Best for: Accuracy-focused trackers, health optimization
MacroFactor
- ✅ AI-powered adaptive coaching
- ✅ Automatically adjusts targets based on results
- ✅ Excellent food logging experience
- ❌ Subscription only, no free version
- 💰 $71.99/year
- Best for: Intermediate trackers, long-term use
Lose It!
- ✅ User-friendly interface
- ✅ Good free version
- ✅ Photo recognition feature
- ❌ Less detail than competitors
- 💰 Free with premium option ($39.99/year)
- Best for: Casual trackers, simplicity
My recommendation: Start with MyFitnessPal (free, massive database). If you want more accuracy, switch to Cronometer. If you want coaching, try MacroFactor.
Setting Up Your App
Once you download your chosen app:
- Create an account
- Enter your stats (age, height, weight, activity level)
- Set your goal (lose, maintain, or gain weight)
- Important: Manually override the calculated macros with YOUR targets from Step 1
Most apps set protein too low by default. Always verify your macro targets match what you calculated.
Step 3: Learn How to Weigh and Log Food
Now for the actual process of tracking. This becomes second nature after a few weeks.
The Basic Logging Process
Before you eat:
- Place your plate or bowl on the scale
- Press the “tare” or “zero” button (resets to 0)
- Add your food
- Note the weight in grams
- Open your app and search for the food
- Enter the amount and log it
- Repeat for each food item
Example: Logging chicken breast
- Put plate on scale → Press tare
- Add chicken → Shows “185g”
- In app: Search “chicken breast raw”
- Enter “185” grams
- Log it
Weighing Raw vs. Cooked
This confuses many beginners. Here’s the rule:
Weigh food RAW whenever possible and use “raw” entries in your app.
Why? Cooking changes weight (water evaporates), but macros stay the same:
| Food | Raw Weight | Cooked Weight | Protein |
|---|---|---|---|
| Chicken breast | 200g | 150g | 46g |
| Rice | 100g (dry) | 300g | 7g |
| Ground beef | 150g | 120g | 38g |
The protein (and other macros) doesn’t disappear — the water does. If you weigh raw and use raw entries, you get accurate macros regardless of how much water cooked off.
If you MUST weigh cooked:
- Search for “cooked” entries specifically
- Understand it’s less accurate
- Be consistent (always weigh the same way)
What to Track (And What You Can Skip)
Always track:
- All protein sources (meat, fish, eggs, dairy, legumes)
- Grains and starches (rice, bread, pasta, potatoes)
- Fats and oils (even cooking spray!)
- Nuts and seeds
- Dairy products
- Sauces and dressings
- Caloric beverages (milk, juice, alcohol, protein shakes)
- Fruits
Low-priority (optional for most):
- Non-starchy vegetables (lettuce, spinach, broccoli, peppers)
- Black coffee and plain tea
- Zero-calorie drinks
- Seasonings (without sugar)
- Hot sauce, mustard
Non-starchy vegetables are so low in calories (20-50 per large serving) that tracking them often isn’t worth the effort. However, if you’re in a strict cutting phase or eat very large quantities, consider logging them.
Tracking Tricky Foods
Cooking oils: Most people massively undertrack cooking oils. One tablespoon of olive oil = 120 calories and 14g fat. If you’re eyeballing it, you’re probably using 2-3 tablespoons.
Solution: Measure oils before cooking, or switch to cooking spray (controlled portions).
Sauces and dressings: Hidden calorie bombs. Ranch dressing, mayo, and creamy sauces add 100-200+ calories per serving.
Solution: Weigh sauces on your scale or use measured portion cups.
Restaurant food: See the dedicated section below on tracking when eating out.
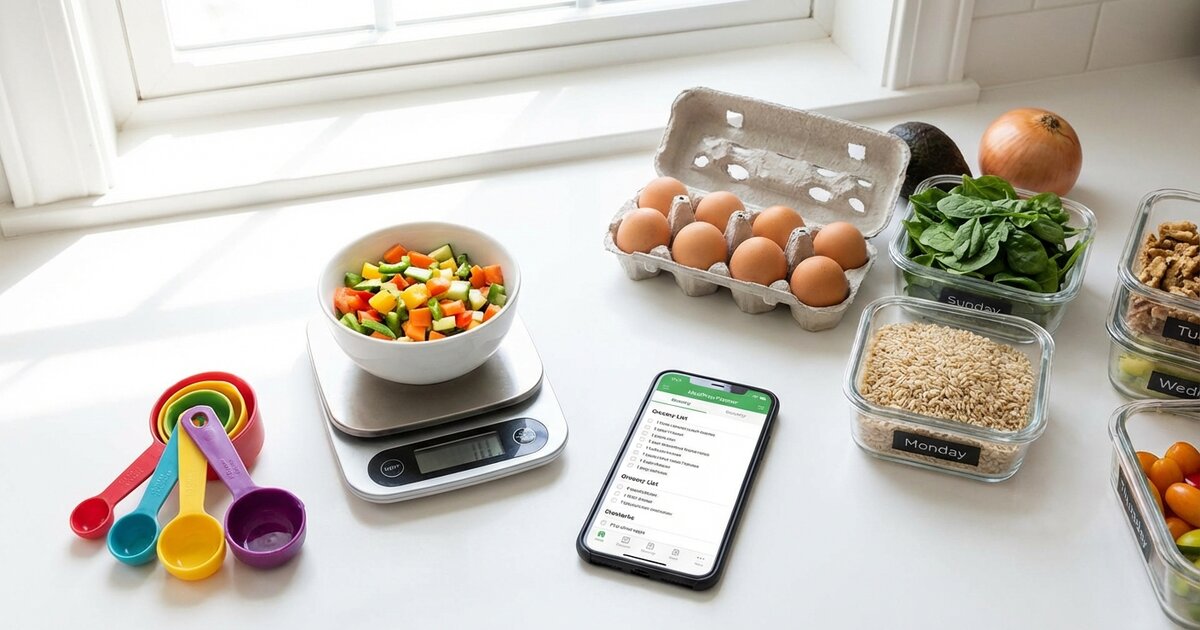
Homemade recipes: Create a recipe in your app:
- Add all ingredients with amounts
- Enter total servings the recipe makes
- Weigh the finished dish total (optional but most accurate)
- Log your portion as “X servings” of the recipe
Most apps save recipes for quick future logging.
Step 4: Strategies to Hit Your Targets
Getting your macros close to target consistently requires some planning (how to hit your macros). Here are proven strategies:
Strategy 1: Pre-Log Your Day
Instead of: Logging as you eat and scrambling to fit things in at the end
Do this: Log your entire day the night before or morning of
Benefits:
- Know exactly what to eat and when
- Adjust portions before you cook/eat
- No end-of-day panic trying to hit protein
- Prevents “oops, I’m out of carbs at 2pm”
How to do it:
- Open your app in the morning (or night before)
- Log your planned meals for the day
- Check totals — adjust portions or swap foods if needed
- Follow the plan
- Make small adjustments if reality differs
Strategy 2: Hit Protein First
For most people, protein is the hardest macro to hit. Build your day around protein sources, then fill in carbs and fats.
Protein-first meal planning:
- Decide on protein for each meal (chicken, fish, eggs, Greek yogurt)
- Add a carb source based on remaining budget
- Include fat from cooking or whole foods
- Add vegetables freely
Protein distribution tip: Aim for 25-50g protein at each meal rather than 10g at breakfast and 100g at dinner. Spreading protein optimizes muscle protein synthesis and is more practical to hit.
Strategy 3: Use “Macro-Friendly” Foods
Some foods make hitting macros easier than others:
High protein, low everything else:
- Chicken breast (31g protein / 165 cal per 100g)
- Egg whites (11g protein / 52 cal per 100g)
- Greek yogurt 0% (10g protein / 59 cal per 100g)
- White fish (cod, tilapia) (20g protein / 85 cal per 100g)
- Shrimp (24g protein / 99 cal per 100g)
High volume, low calorie:
- Vegetables (unlimited-ish)
- Berries (lower sugar than other fruits)
- Popcorn (low-cal snack if air-popped)
- Egg whites (volume for low calories)
Flexible for filling gaps:
- Rice (easy to adjust portions)
- Oats (filling, adjustable)
- Eggs (protein + fat combo)
- Avocado (healthy fat, easy to portion)
Preparing meals in advance removes daily decision fatigue and ensures you consistently hit your numbers (macro meal prep).
Strategy 4: Create Meal Templates
You probably eat similar things each week. Create 3-5 “template” meals you know hit good macros:
Example templates:
Breakfast Template A (40g P / 45g C / 12g F)
- 4 egg whites + 1 whole egg
- 40g oats with berries
- Coffee with splash of milk
Lunch Template B (45g P / 50g C / 15g F)
- 170g chicken breast
- 150g rice (cooked weight)
- Large salad with 1 tbsp olive oil
Dinner Template C (40g P / 30g C / 20g F)
- 170g salmon
- 150g sweet potato
- Roasted broccoli with butter
Rotate templates and you’ll hit macros easily without decision fatigue.
Strategy 5: Allow Flexibility Windows
Perfectionism kills consistency. Build in flexibility:
Acceptable ranges:
- Protein: Within ±5g of target (this one matters most)
- Carbs: Within ±10g of target
- Fat: Within ±10g of target
- Calories: Within ±50-100 of target
If you’re 3g under on protein and 5g over on carbs, don’t stress. That’s excellent tracking.
Step 5: Track When Eating Out
Eating out is where most tracking attempts fail. Here’s how to handle it:
Before You Go
- Check the menu online — Most chain restaurants post nutrition info
- Pre-log your meal — Decide what you’ll order and log it
- Look for protein-first options — Grilled meats, fish, salads with protein
- Identify calorie bombs — Fried foods, cream sauces, large portions
At the Restaurant
If nutrition info is available:
- Order exactly what you logged
- Ask for modifications (sauce on side, no butter, etc.)
- Request to-go box and portion out before eating
If nutrition info isn’t available:
- Search your app for similar items
- Overestimate by 15-20% (restaurants use more fat than you’d think)
- Prioritize protein portions you can visually assess
- Ask how things are prepared (grilled vs. fried, butter added, etc.)
Visual Portion Estimates
When you can’t weigh, use these hand-based guides:
| Food Type | Visual Guide | Approximate Amount |
|---|---|---|
| Protein | Palm of hand | 3-4 oz / 25-30g protein |
| Carbs (rice, pasta) | Cupped hand | 1/2 cup / 20-30g carbs |
| Fats (oil, butter) | Thumb tip | 1 tsp / 5g fat |
| Vegetables | Fist | 1 cup |
| Cheese | Two thumbs | 1 oz / 7g fat |
Best Restaurant Choices for Macros
Generally good options:
- Grilled chicken or fish entrees
- Steaks (ask for no butter on top)
- Fajitas (skip tortillas or use one)
- Salads with grilled protein (dressing on side)
- Poke bowls (ask for macros on add-ins)
- Sashimi (no rice)
Proceed with caution:
- Anything fried
- Cream-based sauces
- Pasta dishes (portion control)
- Rice bowls (often 2+ cups of rice)
- “Healthy” salads (often 800+ calories with dressing)
See our full guide on eating out while tracking macros plus specific guides for Chipotle, Chick-fil-A, and more.
Common Mistakes and How to Avoid Them
After helping thousands track macros, these are the most frequent mistakes (common macro tracking mistakes):
Mistake #1: Not Using a Food Scale
The issue: Eyeballing portions leads to massive underestimation. That “tablespoon” of peanut butter might be 3 tablespoons (300+ extra calories).
The fix: Use a scale religiously for the first month. You’ll develop better intuition over time.
Mistake #2: Forgetting Cooking Oils
The issue: A single tablespoon of oil = 120 calories. If you’re pan-frying and pouring freely, you might be adding 300-400 calories.
The fix: Measure cooking oil before using, or track what’s left in the pan and subtract.
Mistake #3: Not Logging “BLTs” (Bites, Licks, Tastes)
The issue: That bite of your kid’s mac and cheese, the sample at Costco, licking the spoon — they add up.
The fix: Log everything. If you’re tasting while cooking, estimate and log it.
Mistake #4: Trusting User-Submitted App Entries
The issue: MyFitnessPal’s database includes user-submitted entries, some of which are wildly wrong (missing zeros, wrong macros).
The fix:
- Verify entries against nutrition labels or USDA database
- Look for entries with green checkmarks (verified)
- Be suspicious of entries that seem too good to be true
Mistake #5: Inconsistent Tracking Days
The issue: Tracking perfectly Monday-Friday, then not tracking weekends. Two days of untracked overeating can erase a week’s deficit.
The fix: Track every day, especially weekends. If not logging everything, at least track protein and stay conscious of portions.
Mistake #6: Overcomplicating It
The issue: Weighing every grain of rice, stressing over 2g differences, logging herbs and spices.
The fix: Focus on the big rocks — protein sources, carbs, fats, caloric beverages. Don’t sweat the small stuff.
Mistake #7: Giving Up After Bad Days
The issue: Going over macros one day, feeling like a failure, and abandoning tracking.
The fix: One day doesn’t matter. Don’t try to “make up for it” by eating less the next day. Just return to normal targets. Consistency over perfection.
For more, see our guide on common macro tracking mistakes.
Advanced Tips for Experienced Trackers
Once you’ve mastered the basics, these strategies can optimize your tracking:
Weekly Averaging
Instead of hitting exact macros daily, some people average over the week:
- Weekly protein target: Daily target × 7
- Weekly calorie target: Daily target × 7
This allows flexibility for social events (higher day) balanced by lower days. Works well for maintenance and moderate fat loss, less ideal for aggressive cuts.
Carb Cycling
Eat more carbs on training days, fewer on rest days:
Training days: Higher carbs (fuel performance, recovery) Rest days: Lower carbs, slightly higher fat
Total weekly calories stay the same, but you’re prioritizing carbs around activity.
Reverse Dieting
After a fat loss phase, gradually increase calories to find your new maintenance:
- Add 50-100 calories per week
- Monitor weight and measurements
- Stop increasing when weight stabilizes
This prevents rapid weight regain after dieting.
Intuitive Tracking
After 3-6 months of consistent tracking, you may transition to:
- Protein tracking only — Hit protein, estimate rest
- Meal template method — Eat known meals, minimal logging
- Check-in tracking — Track one week per month to stay calibrated
Most long-term successful dieters find a sustainable middle ground between obsessive tracking and zero awareness.
Sample Day of Macro Counting
Here’s exactly what a day of tracking looks like:
The Plan (Logged in Morning)
Goal: 2,000 cal | 160g protein | 200g carbs | 67g fat
Breakfast:
- 3 whole eggs (234 cal | 18g P | 2g C | 15g F)
- 2 slices whole wheat toast (160 cal | 8g P | 28g C | 2g F)
- 1 tbsp butter (102 cal | 0g P | 0g C | 12g F)
- Coffee with splash of milk (15 cal | 1g P | 2g C | 0g F)
Lunch:
- 200g chicken breast, raw weight (330 cal | 62g P | 0g C | 7g F)
- 150g rice, cooked (195 cal | 4g P | 43g C | 0g F)
- 1 cup broccoli (55 cal | 4g P | 11g C | 0g F)
- 1 tbsp olive oil for cooking (119 cal | 0g P | 0g C | 14g F)
Snack:
- 200g Greek yogurt 0% (118 cal | 20g P | 8g C | 0g F)
- 100g berries (57 cal | 1g P | 14g C | 0g F)
- 30g almonds (173 cal | 6g P | 6g C | 15g F)
Dinner:
- 170g salmon fillet (354 cal | 40g P | 0g C | 21g F)
- 150g sweet potato (129 cal | 2g P | 30g C | 0g F)
- Large salad with veggies (30 cal | 2g P | 6g C | 0g F)
Totals: 2,071 cal | 168g P | 150g C | 86g F
Wait — fat is over target. Let me adjust:
Adjustment: Reduce almonds to 15g, skip butter on toast, use less oil (spray instead)
Revised totals: 1,940 cal | 164g P | 148g C | 64g F ✓
This is why pre-logging works — you catch issues before eating.
Timeline: What to Expect
Here’s a realistic timeline for macro tracking mastery:
Week 1: Learning Phase
- Everything feels tedious
- You’ll forget to log things
- Searching foods takes forever
- Focus: Just log consistently, don’t stress about hitting targets
Weeks 2-3: Building Habits
- Logging gets faster (saved foods, frequent items)
- You start recognizing food macros intuitively
- Pre-logging becomes helpful
- Focus: Start pre-planning days, hit protein target
Weeks 4-6: Competency
- Logging takes 5-10 minutes per day total
- You know macro content of common foods
- Hitting targets most days
- Focus: Refine meal templates, optimize food choices
Months 2-3: Proficiency
- Tracking is automatic
- You can estimate accurately when needed
- Results are visible
- Focus: Fine-tune based on results, consider strategic flexibility
Beyond 3 Months: Mastery
- Option to reduce tracking (protein only, templates, periodic check-ins)
- Intuitive understanding of portions
- Sustainable long-term approach
- Focus: Find your minimum effective tracking dose
Related Articles
- How to Track Your Macros: Complete Beginner
- 10 Common Macro Tracking Mistakes (And How to Fix Them)
- How to Hit Your Macros: Practical Strategies That Work
- How to Eat Out on a Macro Diet (Without Blowing Your Goals)
- 30 Macro Friendly Meals: Easy Recipes That Hit Your Targets
Frequently Asked Questions
How do I calculate my macros?
Calculate your TDEE (total daily energy expenditure), then distribute those calories across protein (0.7-1g per pound bodyweight), fats (0.3-0.4g per pound), and carbs (remaining calories divided by 4). Our free calculator does this in 60 seconds.
Do I need to track macros every day?
Initially, yes — consistent tracking for 4-6 weeks builds awareness of portion sizes and food composition. After that, many people track only during cutting phases or when eating unfamiliar foods, relying on built-in intuition the rest of the time.
What’s the best app for tracking macros?
MyFitnessPal has the largest food database and is great for beginners. Cronometer is most accurate and tracks micronutrients too. MacroFactor uses AI to adjust your targets automatically. Try a few and stick with what you’ll actually use.
How accurate do I need to be?
Aim for within 5-10% of your targets. Perfect accuracy is impossible and unnecessary. Hit protein within 5g, carbs and fat within 10g, and total calories within 50-100. Consistency matters more than perfection.
Should I weigh food raw or cooked?
Weigh raw when possible and use “raw” entries in your app. Raw weights are more consistent because cooking evaporates water differently each time. If you must weigh cooked, search for “cooked” entries specifically.
Do I count vegetables?
Non-starchy vegetables (leafy greens, broccoli, peppers) are so low in calories that many people don’t track them strictly. Starchy vegetables (potatoes, corn, peas) should be tracked. If you’re very detail-oriented or in a strict cut, track everything.
How do I track when eating out?
Check the restaurant’s nutrition info online before going, search for similar items in your app, estimate portions using hand-size guides, and round up slightly to account for hidden oils and sauces. Plan ahead when possible. See our eating out guide for more detail.
What if I go over my macros?
One day won’t ruin progress. Don’t try to compensate by eating less the next day — just return to normal. If you’re consistently over, your targets may be too aggressive, or you need better meal planning strategies.
How long until I see results from tracking macros?
Most people notice improved energy and workout performance within 1-2 weeks. Visible body composition changes typically appear in 3-6 weeks with consistent tracking and appropriate calorie targets.
Can I still drink alcohol while tracking macros?
Yes, but alcohol has 7 calories per gram and provides no nutritional benefit. Log it as carbs or take from your carb/fat budget. Prioritize protein, and limit alcohol on fat loss phases as it pauses fat oxidation.
Do I need to track on weekends?
Yes — weekends count. Untracked weekends are the #1 reason people don’t see results. Two untracked days of overeating can wipe out a week’s deficit. Stay consistent, or at minimum, track protein and estimate the rest.
How do I track homemade meals?
Create recipes in your app by entering all ingredients and servings. Weigh the total finished dish, divide into portions, and log the portion size. Most apps let you save recipes for quick future logging.
Calculate Your Macros Now
Ready to start? Get your personalized macro targets calculated in 60 seconds.
Get Your Personalized Macros
Science-backed formulas. No email required. Free forever.
Calculate My Macros →Summary
Counting macros is the most effective approach for anyone with specific body composition goals. Here’s the process in brief:
- Calculate your targets using TDEE and goal-based formulas (calculator)
- Get a food scale — non-negotiable for accuracy
- Download a tracking app — MyFitnessPal, Cronometer, or MacroFactor
- Weigh and log everything — raw weights when possible
- Pre-log your day — plan meals in advance
- Hit protein first — build meals around protein sources
- Allow flexibility — ±5-10g variance is fine
- Stay consistent — especially on weekends
After 4-6 weeks of consistent tracking, you’ll have developed nutritional literacy that serves you for life. The effort is worth it.
Next steps:
- Calculate your personal macros
- Read our counting macros for beginners guide for a step-by-step walkthrough
- Learn how to track your macros effectively with apps
- Avoid common macro tracking mistakes that trip up beginners
- Discover how to hit your macros consistently every day
- Master macro meal prep to make hitting your targets effortless
- Find the best macro tracking apps for your needs
- Learn about macros for weight loss or muscle gain
- Explore flexible dieting / IIFYM for sustainable tracking
Related Articles
Counting Macros for Beginners: The Complete Starter Guide
New to counting macros? This guide walks you through everything step-by-step — from...
Read guide →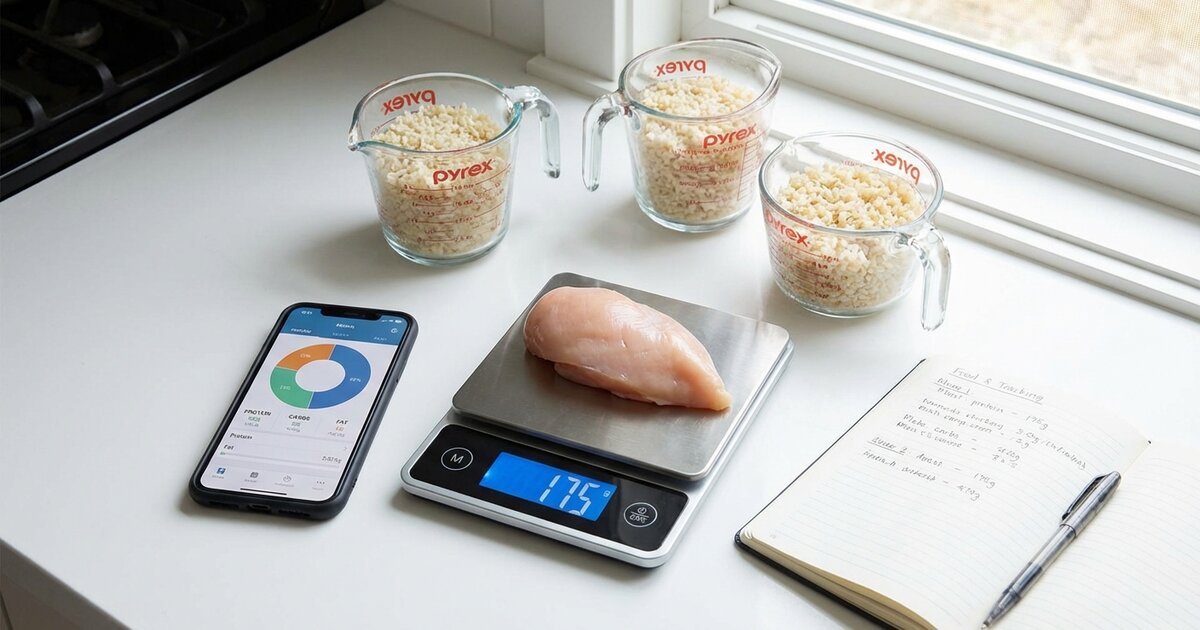
How to Track Your Macros: Complete Beginner's Guide
Learn how to track macros accurately with apps, scales, and simple techniques. Complete...
Read guide →10 Common Macro Tracking Mistakes (And How to Fix Them)
Not seeing results from tracking macros? You're probably making one of these 10 common...
Read guide →